Introduction
Good construction techniques, high-quality materials, and regular maintenance add many years to the life of a deck. You should pay close attention to the following five major weak areas:
|
|
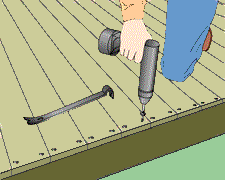
You'll be looking for soft spots, indicating rot. Do this simply by poking the wood with a screwdriver or awl. If you find part of the deck seems to be in worse condition than other parts, try to find the source of the problem before attempting a repair. Perhaps water damage is occurring in one spot because of faulty gutters or the accumulation of leaves or dirt. If you find potentially serious problems at the ledger, posts, beams, or joists, consult a professional. Most components of a deck can be repaired or replaced, but repairing some elements are trickier than others.
|
1. Check the ledger
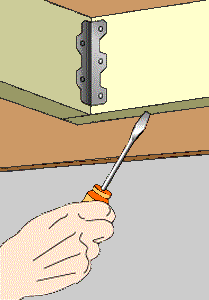
The connection between the deck and the house is particularly critical. Check that flashing is in good condition. Use a probe to inspect for water damage on the ledger. Check for bodies of fungi, blue or black stains, and little piles of sawdust indicating the presence of termites or carpenter ants. Tighten all fasteners.
|
|
|
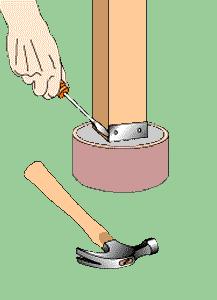
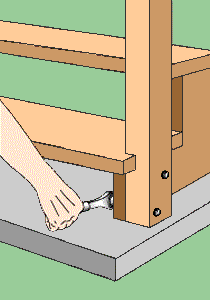
2. Check the posts
Check posts most carefully at the ground line and at the top. Use a probe to inspect for rot by sticking it into various parts of the post and comparing the ease of penetration. Try to assess the internal condition--posts often decay from the inside out. Inspect and secure the post's connection with the foundation.
|
|
|
3. Check beams and joists
Use a probe around the ends of joists, where they are most prone to rot. If joists sit on top of a beam, check the contact spots. Inspect the connection between the beams and posts. Determine if any joists seem to be slow in drying out.
|
|

|
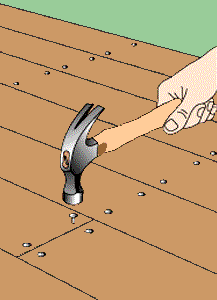
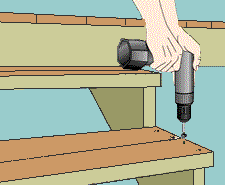
4. Check the decking
This is the easiest part to inspect. Pay special attention to the ends of boards and areas around and under butt joints. Tighten nails or screws in the decking and replace badly damaged boards. Inspect for rot where the decking boards meet the joists.
|
|
|
5. Check the railing
Railings, and especially stair rails, often are subject to extra strain. Inspect posts for signs of damage and make sure all fasteners are secure and tight. Look at the ends of all rails for water damage. Replace broken balusters.
|
|
|
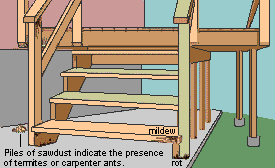
6. Check stringers and treads
Inspect stringers for splits or rot, especially around areas in contact with treads and other wood. The cut portions of stringers have exposed end grain, some portions of which face upward and can collect water; this is a very common problem area. Check the top and bottom connections of stringers. Tighten railing posts and replace damaged treads. If a tread has cupped so it now collects a small puddle of water when it rains, turn it upside-down or replace it.
|
|
|
7. Make an overall assessment
Make an assessment of your total deck by looking for potential problems besides rot. Check that everything is still plumb and level, especially posts, whose footings may have settled. Small piles of sawdust or tunnels following the grain of wood indicate wood-eating insects. Black slime indicates the presence of mildew (see Step 8). If fasteners are causing rust stains on the wood, replace them. Inspect concrete pads for cracks.
|
|
|
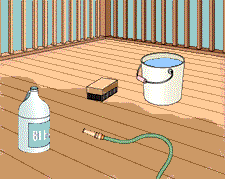
8. Remove mildew
If the decking is cedar, a spot of black slime may not be mildew; it could be a natural substance that sometimes leaches out. Just wash it with a mild soap-and-water solution. If you have other types of wood or if the black slime persists and seems related to moisture, then you've got mildew. It won't affect the strength of your wood, but you will want to get rid of it.
|
|
|
9. Replace popping nails
As decking shrinks, nail heads may need to be hammered in farther. Over time, however, nails may start to loosen in their holes. In this case, carefully remove the nails, using a flat pry bar and/or a small piece of scrap wood to keep from denting the surface of the deck. Replace the nails with 3-inch decking screws. Or, drive new nails into the old holes in the decking, but at a different angle to avoid the old holes in the joists.
|
|